Chocolate and orange fudge are swirled together to create these delicious and festive Halloween Fudge Pinwheels. This holiday fudge is made using just three ingredients.
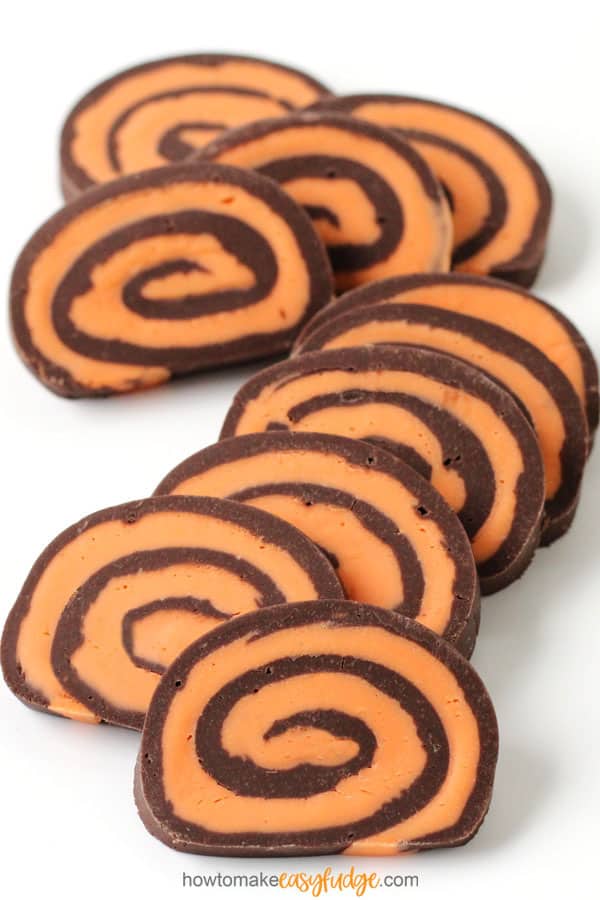
When making orange and black or orange and chocolate fudge you can certainly just layer the two in the pan and call it a day, but Halloween is such a fun holiday that I wanted to make this fudge fun too.
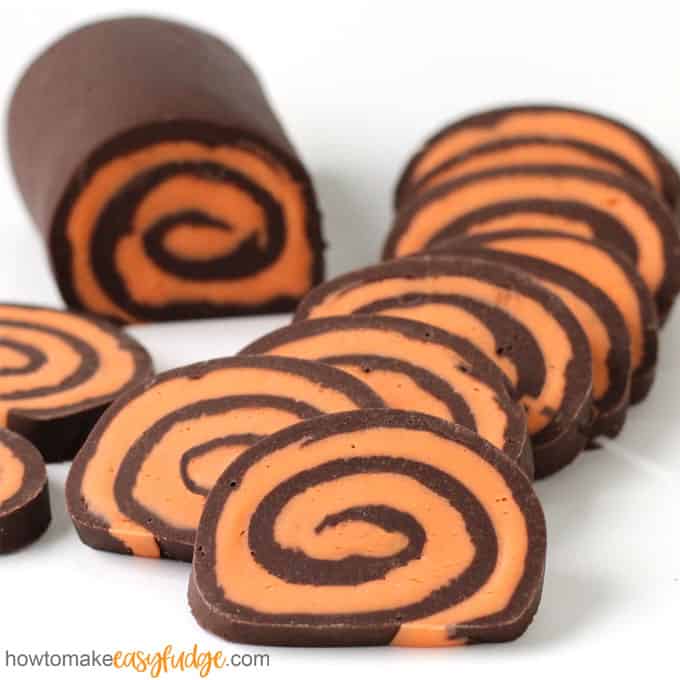
So, I layered dark chocolate fudge with orange-colored fudge then rolled the layers up into a log and cut it into slices. When cut, the fudge has a pretty pinwheel design.
I chose to create my fudge using Wilton's Orange and Dark Cocoa Candy Melts in order to keep the ingredients list short and the recipe really simple.
I realize Halloween colors are traditionally black and orange, not dark brown and orange, but I really wanted this fudge to have a combination of chocolate and vanilla flavors.
If you prefer, you can swap out vanilla-flavored Black Candy Melts for the Dark Cocoa Candy Melts, but you will need to use a different ratio which I list below.
I was pleasantly surprised by the flavor and texture of this fudge made with Candy Melts. It really is quite delicious and amazingly smooth.
You can also use semi-sweet chocolate and white chocolate chips if you don't have access to Candy Melts. I'll give you the quantities in the recipe below.

Let's make fudge pinwheels!
You'll need:
- 8 ounces dark cocoa Candy Melts*
- (or use 10 ounces of Black Candy Melts or 6 ounces of pure semi-sweet chocolate or chips)
- 10 oz of orange candy melts
- (or use 10 ounces of white chips made using palm kernel oil or use 12 ounces of white chips made using cocoa butter)
- 14 oz sweetened condensed milk

*Alternatives to Candy Melts
- You can use any compound chocolate (also known as Candy Melts, melting wafers, almond bark, or confectionery coating) including Merckens, Peter's, Make 'n Mold, or Ghirardelli Melting Wafers.
- If you don't have Orange Candy Melts, you can simply use white candy melts and add orange food coloring once you have melted the candy melts with the sweetened condensed milk.
- I give even more alternatives in my Orange Fudge Carrots recipe post.
What is pure chocolate vs. Candy Melts?
- The difference between Candy Melts and Pure Chocolate is the fat that is used to make the chocolate. Pure Chocolate contains cocoa butter while Candy Melts are made using vegetable fat, typically palm kernel oil.
- If you'd like to learn more about these two types of chocolate be sure to check out my Chocolate Making Tips page over on HungryHappenings.com.
Instructions:
- Line a 9 by 13-inch baking pan or cookie sheet with nonstick tinfoil or with regular tin foil or parchment paper that has been sprayed with baking spray. See the video for a neat trick to easily line the pan.
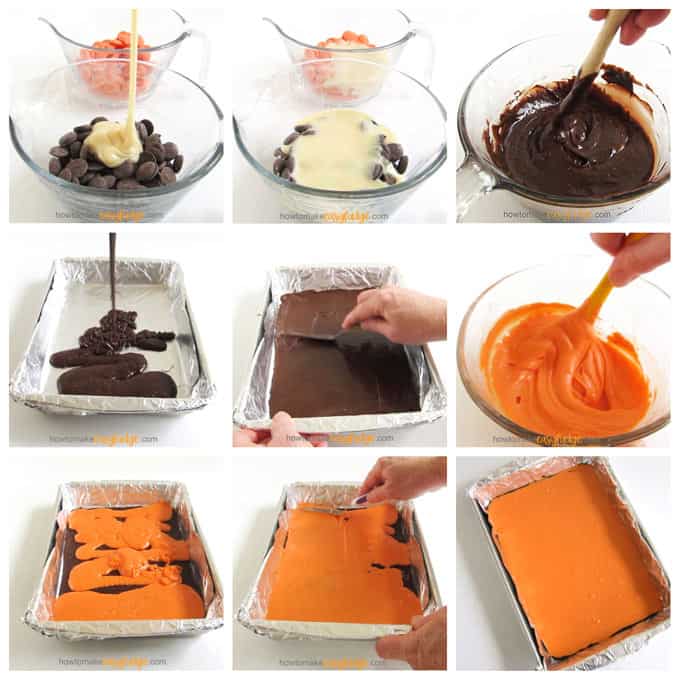
- Pour the dark cocoa Candy Melts into a microwave-safe bowl and pour the orange candy melts into another.
- Equally, divide the sweetened condensed milk.
- There are approximately 1 and ⅓ cups of sweetened condensed milk in one 14 oz can so you'll need about ⅔ cup for each bowl of candy melts.
- You may also use a scale to measure out half of the sweetened condensed milk but note that in testing this recipe several times I never got exactly 14 ounces out of the can. I measured 6.8 ounces into each bowl.
Microwave method:
- Stir the Dark Cocoa Candy Melts and the sweetened condensed milk.
- Then heat it in the microwave at 70% power for 1 minute.
- Remove the bowl and stir the chocolate until it begins to melt.
- Heat for an additional 45 seconds at 70% power.
- Then allow the bowl to rest in the microwave for 3 minutes, allowing the residual heat to melt the wafers.
- Remove the bowl from the microwave and stir the chocolate until most of the wafers have melted.
- Heat for additional 15-second bursts of 70% power, allowing the bowl to rest in the microwave for a minute or two before stirring until all of the chocolate has melted.
- Pour the dark chocolate fudge into the pan and spread it into an even layer.
- Cover the pan and chill in the refrigerator for 30 minutes.
- NOTE: If using Black Candy Melts, heat for 90 seconds at 70% power then let rest in the microwave for about 3 minutes before stirring until melted. If using semi-sweet chocolate heat for 60 seconds at 70% power then stir until melted. Heat for additional 10-15 second bursts of 70% power, only if needed.
- Once the chocolate fudge is ready, heat the bowl of orange candy melts and sweetened condensed milk in the microwave at 70% power for 90 seconds.
- Allow the bowl to rest in the microwave for about 3 minutes then remove it and stir until completely melted and smooth.
- If needed, you can return the bowl to the microwave and heat it at 70% power for 15-second bursts of power, stirring after each, until melted.
- Pour the orange fudge over the chocolate fudge layer and spread it into an even layer.
- Cover and chill the fudge for 30 minutes.
- Remove the fudge from the refrigerator and let it rest for about 2 hours until it no longer feels cool.
Stove-top Method:
- Instead of pouring the candy melts and sweetened condensed milk into microwave-safe bowls, pour them into small saucepans instead.
- Place the saucepan containing the dark cocoa candy melts on the stove set over low heat.
- Allow it to slowly melt, stirring it often, until about 75% of the chocolate is melted.
- Remove the pan from the heat and stir until all of the wafers have melted.
- Spread into the pan, cover, and chill.
- Repeat for the orange candy melts.
- Continue with the instructions listed in the microwave method.
Can I use different colors?
- Absolutely. You can use any two colors you would like. Try red and green for Christmas, red and white for Valentine's Day, black and white for New Year's Eve, green and white for St. Patrick's Day, etc.
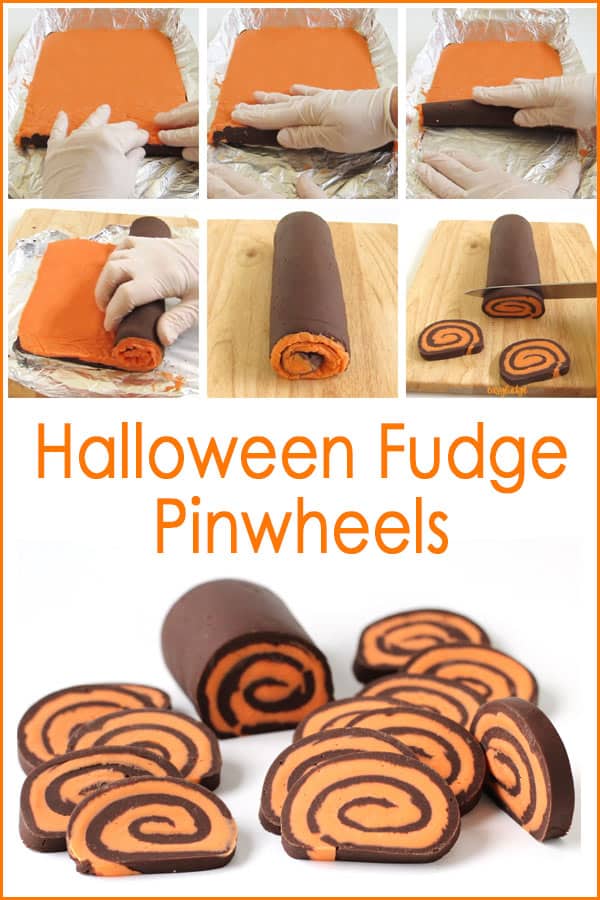
Roll the fudge pinwheels.
- Lift the fudge out of the pan using the tin foil and peel away the tin foil.
- Then roll it into a 9-inch long log. Be sure to roll the fudge as tightly as possible.
- If the orange fudge has developed bumps, you might want to warm a metal offset spatula and run it over the fudge to smooth out the bumps before rolling the fudge.
- Use a sharp knife to cut ¼-inch thick slices.
- I recommend you wipe your knife in between each cut so that you get nice pinwheels.
Video
Be sure to watch the video to see a visual view of how to make these swirled fudge pinwheels.
Recipe
Get a printed copy of our How To Make Easy Fudge cookbook from Amazon or a printable E-book from EJunkie. The full-color fudge cookbook features 60 of our most popular easy fudge recipes.
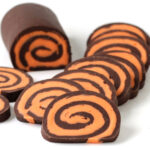
Layers of chocolate fudge and orange-colored fudge are rolled together and cut into pinwheels.
- 8 ounces dark cocoa Candy Melts (or 10 ounces of Black Candy Melts or 6 ounces of pure semi-sweet chocolate or chips)
- 10 oz orange candy melts (or 10 ounces Nestle Premier White Morsels or 12 ounces pure white chocolate chips)
- 14 oz sweetened condensed milk
- Line a 9 by 13-inch baking pan or cookie sheet with nonstick tinfoil.
- Pour the dark cocoa Candy Melts into a microwave-safe bowl and pour the orange candy melts into another.
Equally, divide the sweetened condensed milk among the bowls (approximately ⅔ cup in each).
- Stir the Dark Cocoa Candy Melts and the sweetened condensed milk.
Then heat it in the microwave at 70% power for 1 minute.
Remove the bowl and stir the chocolate until it begins to melt.
Heat for an additional 45 seconds at 70% power.
Then allow the bowl to rest in the microwave for 3 minutes, allowing the residual heat to melt the wafers.
Remove the bowl from the microwave and stir the chocolate until most of the wafers have melted.
Heat for additional 15-second bursts of 70% power, allowing the bowl to rest in the microwave for a minute or two before stirring until all of the chocolate has melted.
Alternatively, melt the candy melts and sweetened condensed milk in a saucepan set on the stove over low heat.
Pour the dark chocolate fudge into the pan and spread it into an even layer.
Cover the pan and chill in the refrigerator for 30 minutes.
Once the chocolate fudge is ready, heat the bowl of orange candy melts and sweetened condensed milk in the microwave at 70% power for 90 seconds.
Allow the bowl to rest in the microwave for about 3 minutes then remove it and stir until completely melted and smooth.
If needed, you can return the bowl to the microwave and heat it at 70% power for 15-second bursts of power, stirring after each, until melted.
- Pour the orange fudge over the chocolate fudge layer and spread into an even layer.
Cover and chill the fudge for 30 minutes.
Remove the fudge from the refrigerator and let it rest for about 2 hours until it no longer feels cool.
Roll the fudge pinwheels.
Lift the fudge out of the pan using the tin foil and peel away the tin foil.
- Then roll into a 9-inch long log. Be sure to roll the fudge as tightly as possible.
- If the orange fudge has developed bumps, you might want to warm a metal offset spatula and run it over the fudge to smooth out the bumps before rolling the fudge.
Use a sharp knife to cut into about 20 thick slices.
- I recommend you wipe your knife in between each cut so that you get nice pinwheels.
- Stove-top Method:
- Instead of pouring the candy melts and sweetened condensed milk into microwave-safe bowls, pour them into small saucepans instead.
- Place the saucepan containing the dark cocoa candy melts on the stove set over low heat.
- Allow it to slowly melt, stirring it often, until about 75% of the chocolate is melted.
- Remove the pan from the heat and stir until all of the wafers have melted.
- Spread into the pan, cover, and chill.
- Repeat for the orange candy melts.
- Continue with the instructions listed in the recipe.
Alternative Chocolate
- If using Black Candy Melts, heat for 90 seconds at 70% power then let rest in the microwave for about 3 minutes before stirring until melted. If using semi-sweet chocolate heat for 60 seconds at 70% power then stir until melted. Heat for additional 10-15 second bursts of 70% power, only if needed.
If you enjoy this easy Halloween fudge recipe you might also like these...


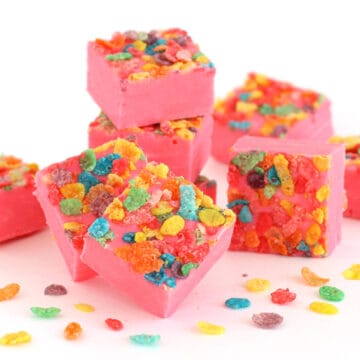
- Fruity Pebbles Fudge - March 30, 2024
- Hot Chocolate Fudge - November 14, 2023
- white chocolate macadamia nut fudge - June 12, 2023
Please leave a comment.